
LOGIN TO SALESFORCE
Here's the URL: go.uvm.edu/salesforce
FIND TOP MENU ITEM "CONTENT BUILDER"
- "Create" upper right
- "Create Email message"
- Choose small "folders" icon / link that is to the right of the search field
- Drill down into "Multipurpose template" > "Template" > choose either "Multipurpose" for a newsletter or "Letter" to format and send a memo.
- Select
DEFINE PROPERTIES TAB
- “Select” lower right
- Give it a name. Style we’ve been using: Faculty and Staff Newsletter [May 5, 2020]
- Description is internal facing for your use.
- “Save”
ADD CONTENT TAB
- Give it a Subject. Can be different weekly or the same. We’ve been using: UVM Today weekly e-newsletter for the newsletter. If it's a memo, I'd suggest using the memo's given subject: "Fall 2020: Student Policy Notification."
- Give it a Pre-header. This is is the short summary text that follows the subject line when viewing an email from the inbox; an opportunity to tip someone off about what's inside before they open it. Not all email clients display this. An example for UVM Today newsletter: "Stories from the UVM community and campus updates." For above memo example it could be something like "Annual student policy notification."
BEGIN BUILDING YOUR NEWSLETTER
- If you’re re-entering to edit once it’s already been built, go to the Content Builder, find and choose your email, “Edit content” in the upper right corner. For the newsletter format, you'll double click into each block to be able to add text in the left edit panel.
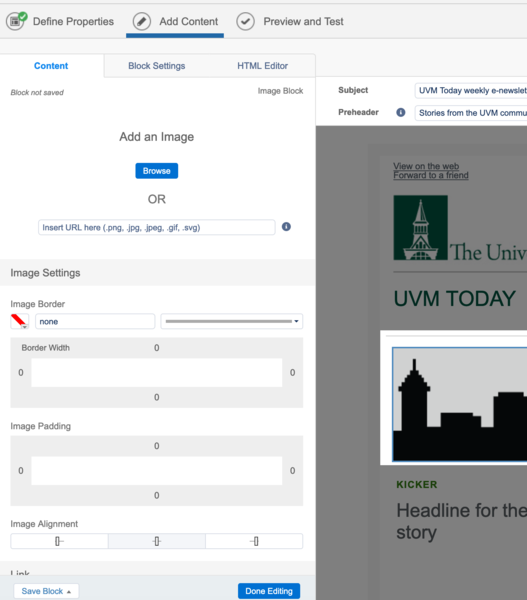
ADD IMAGES
To get to the image location, just continue to click on it until the left column reveals “Add an Image” — you’ll want to browse to find pre-uploaded or upload a new.
Tips for Campus Communications via the CCO's office:
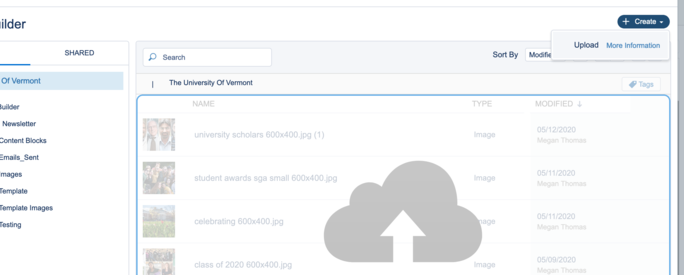
- You can find presized images under CCO Communications > Images > Campus Beauty.
- In order to select from the pre-designed mastheads "From the Office of .... ", go to UVM Multipurpose Template > Images > Mastheads
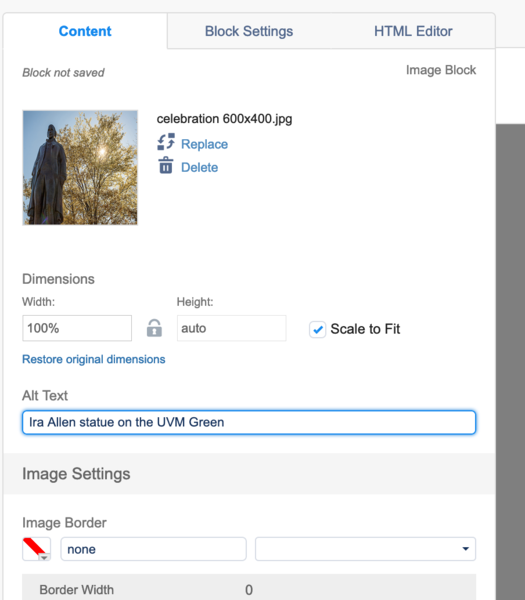
Images should be 600x400 and 72 dpi -- sizing happens outside of Salesforce. Please save your image in the "Images" folder for your e-Newsletter rather than loose. The extra effort for good file organization will make everyone's job easier who uses Salesforce.
In order to select from the pre-designed mastheads "From the Office of .... ", go to UVM Multipurpose Template > Images > Mastheads
You can upload all images for an issue in bulk. Again, please make sure you save your images in the "Images" folder for your e-Newsletter rather than loose.
Once you place an image in its desired spot, you'll want to adjust the settings. Set the width to 100%; this will automatically adjust the height to auto. You'll also add an alt tag. More info on alt tags in our documentation.
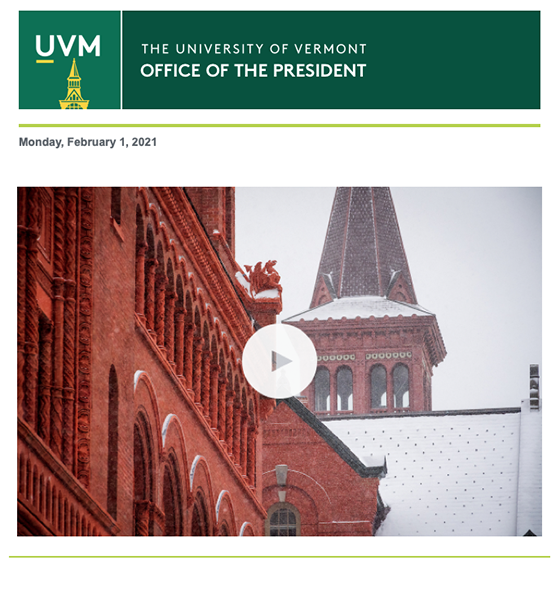
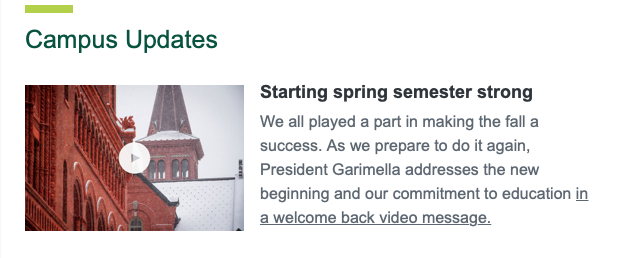
Creating an image with a video play icon overlay
Sometimes we want to provide an image link to a video in the e-Newsletter. We have a Photoshop template that makes it fast and easy to export an image with a video play icon overlay. The play icon is large enough to scale so that this image can be used either in the full width hero-banner position (big intro image), or as a smaller image in a 2-col layout. After you have your image, you just need to add the URL hyperlink to it within Salesforce.
Here is what this image looks like shown in a 1-column layout as well as placed into a 2-column layout.
Download the Photoshop template with the video play icon.
You can also just download the video play icon. It's a PNG so don't scale it as it will degrade.
EDIT CONTENT
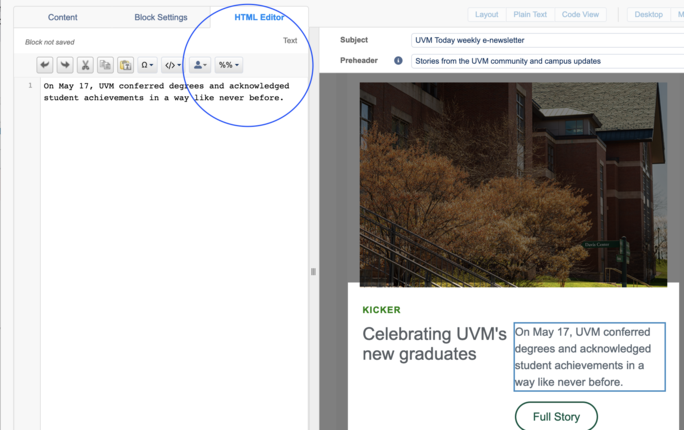
Continue to click into text blocks in order to see the text to edit in the left column. If you’re copying and pasting something with formatting (ie: a yellow highlight), it will drop the formatting in with the copy/paste. To avoid this, go into the HTML tab, highlight existing and replace -- or -- read on to learn about adjusting your content in Word before you copy/paste.
ADD UTM CODES
There is a global way to add UTM codes that is currently not working. You can still add these manually so that you can track the performance of this communication. You add these on to the end of links. Adjust the date each week:
UVM Today Weekly: ?utm_source=salesforce&utm_medium=email&utm_campaign=uvm_newsletter_05192020
Return to Campus Weekly: ?utm_source=salesforce&utm_medium=email&utm_campaign=rally_newsletter_06162020
The full URL will look like this: https://www.uvm.edu/uvmnews/news/meet-class-2020?utm_source=salesforce&utm_medium=email&utm_campaign=uvm_newsletter_05192020
TIPS FOR COPYING TEXT FROM MICROSOFT WORD INTO SALESFORCE - USING A MAC
Text coming from Microsoft Word maintains the styling and attributes from Word and creates a lot of styling problems when pasted into Salesforce. Converting the text from Microsoft Word into Plain Text doesn't solve the problem as it will not only strip out all the styling but also remove the hyperlinks. Here are a few steps to get your copy out of Word and enable it to adopt the styles in Salesforce while also keeping the hyperlinks.
The video provides more guidance, but basically:
- Open your content in Microsoft Word
- Select all of the content and then under Home/Styles dropdown/ select "Clear Formatting"
- Make sure you are showing the Styles panel by selecting "Styles" when the "Home" tab is selected. Select "Modify Style" under the "Hyperlinks" menu at the bottom of the list. Change the color of the hyperlinks to a dark gray.
- Copy all of your text and paste it into you Salesforce template. If your text is still not adopting the Arial sans-serif font in Salesforce, go back to Microsoft Word, assign "Arial" to the "Normal" type style, copy and paste it again into Salesforce.
TIPS FOR COPYING TEXT FROM MICROSOFT WORD INTO SALESFORCE - USING A PC
- Select your content in Microsoft Word.
- Select Styles and clear formatting.
- Select Styles, then Apply Styles. Select Hyperlink.
- Under Font, select Arial and deselect “U’ for underlining.
- Copy all of your text and past it into your Salesforce template.
- Go into HTML Editor (in Salesforce) and delete underlining.
SEND A PREVIEW AND TEST
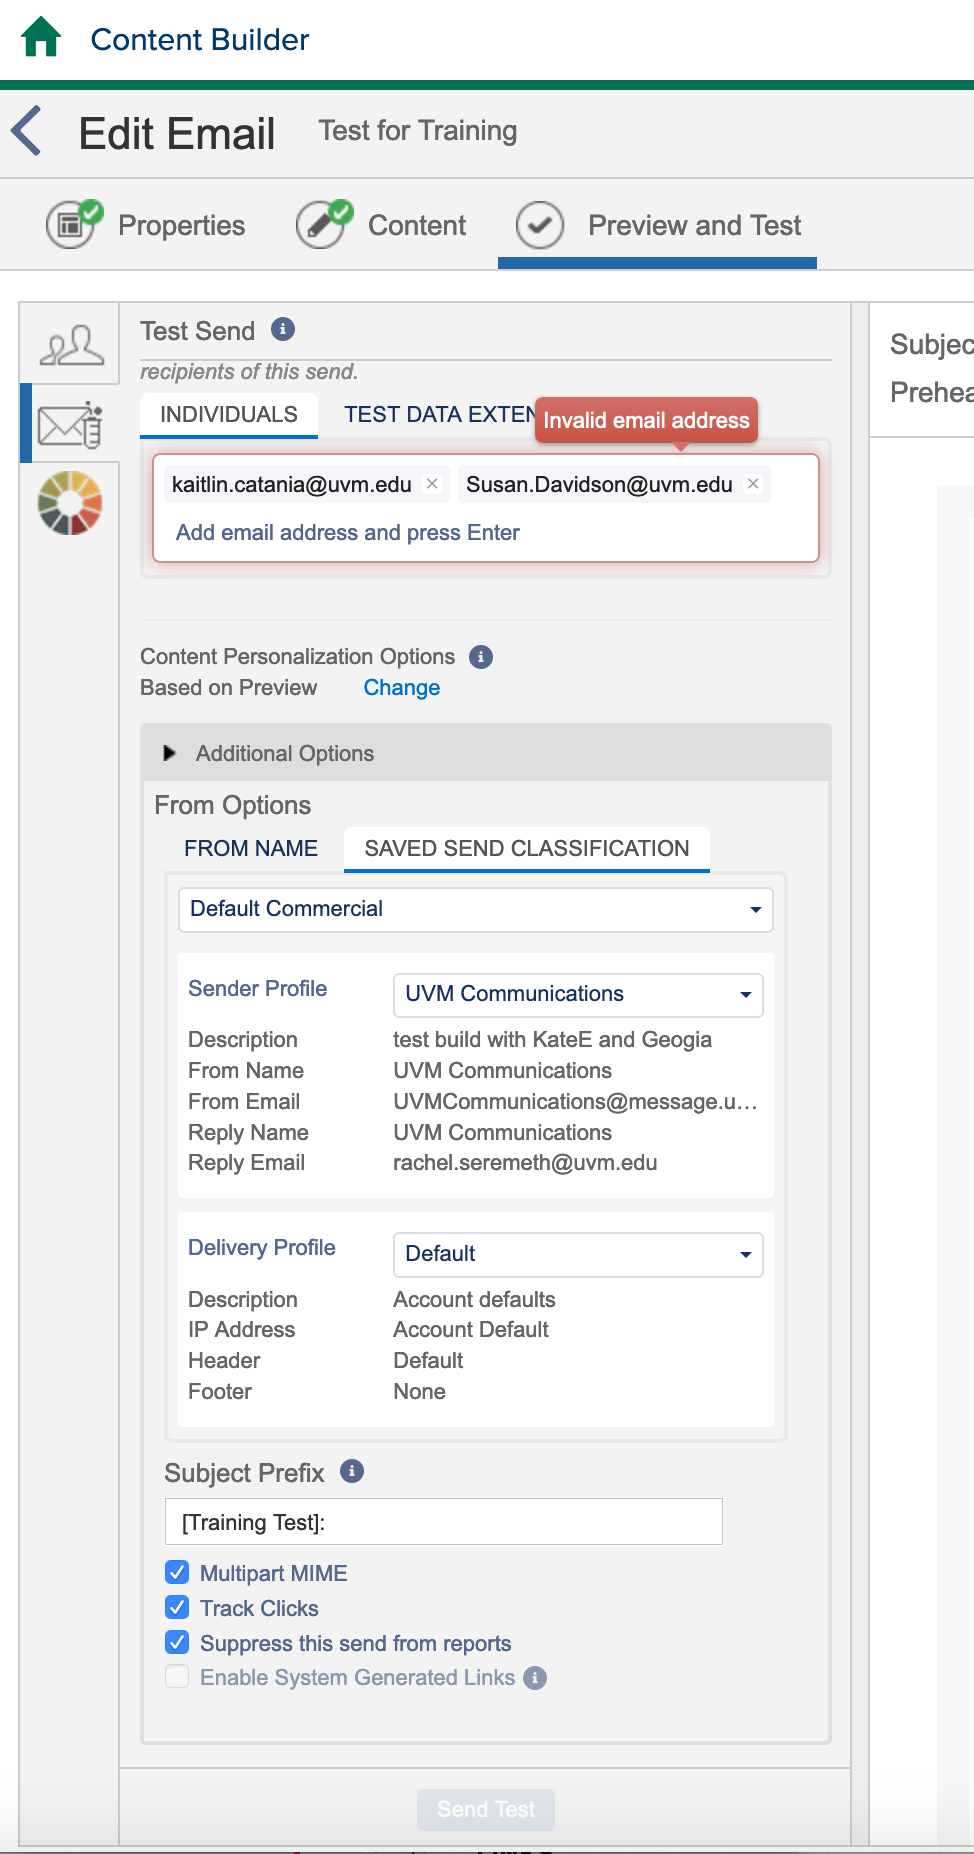
You'll want to send yourself and potentially the reviewer / creator a test (or two!) Go to the "Preview and Test" tab, envelope button, add your email address (it should autofill), "Send Test" at the bottom.
INITIATING OR SCHEDULING YOUR FINAL SEND
This assumes that you have confirmed that your audience exists in Salesforce and can be sent through this platform.
- Email Studio
- Select the newsletter or commumication you want to send.
- Select “Send” to Define Properties of the send.
- Select “Commercial" or "Transactional" — basic difference — Commercial is marketing / advertising sends that recipients will want the freedom to opt out of. Transactional covers things you can’t opt out of like policies, requirements, etc.
- Set Sender profiles (more on this below)
- Select “Next” in order to select your audience.
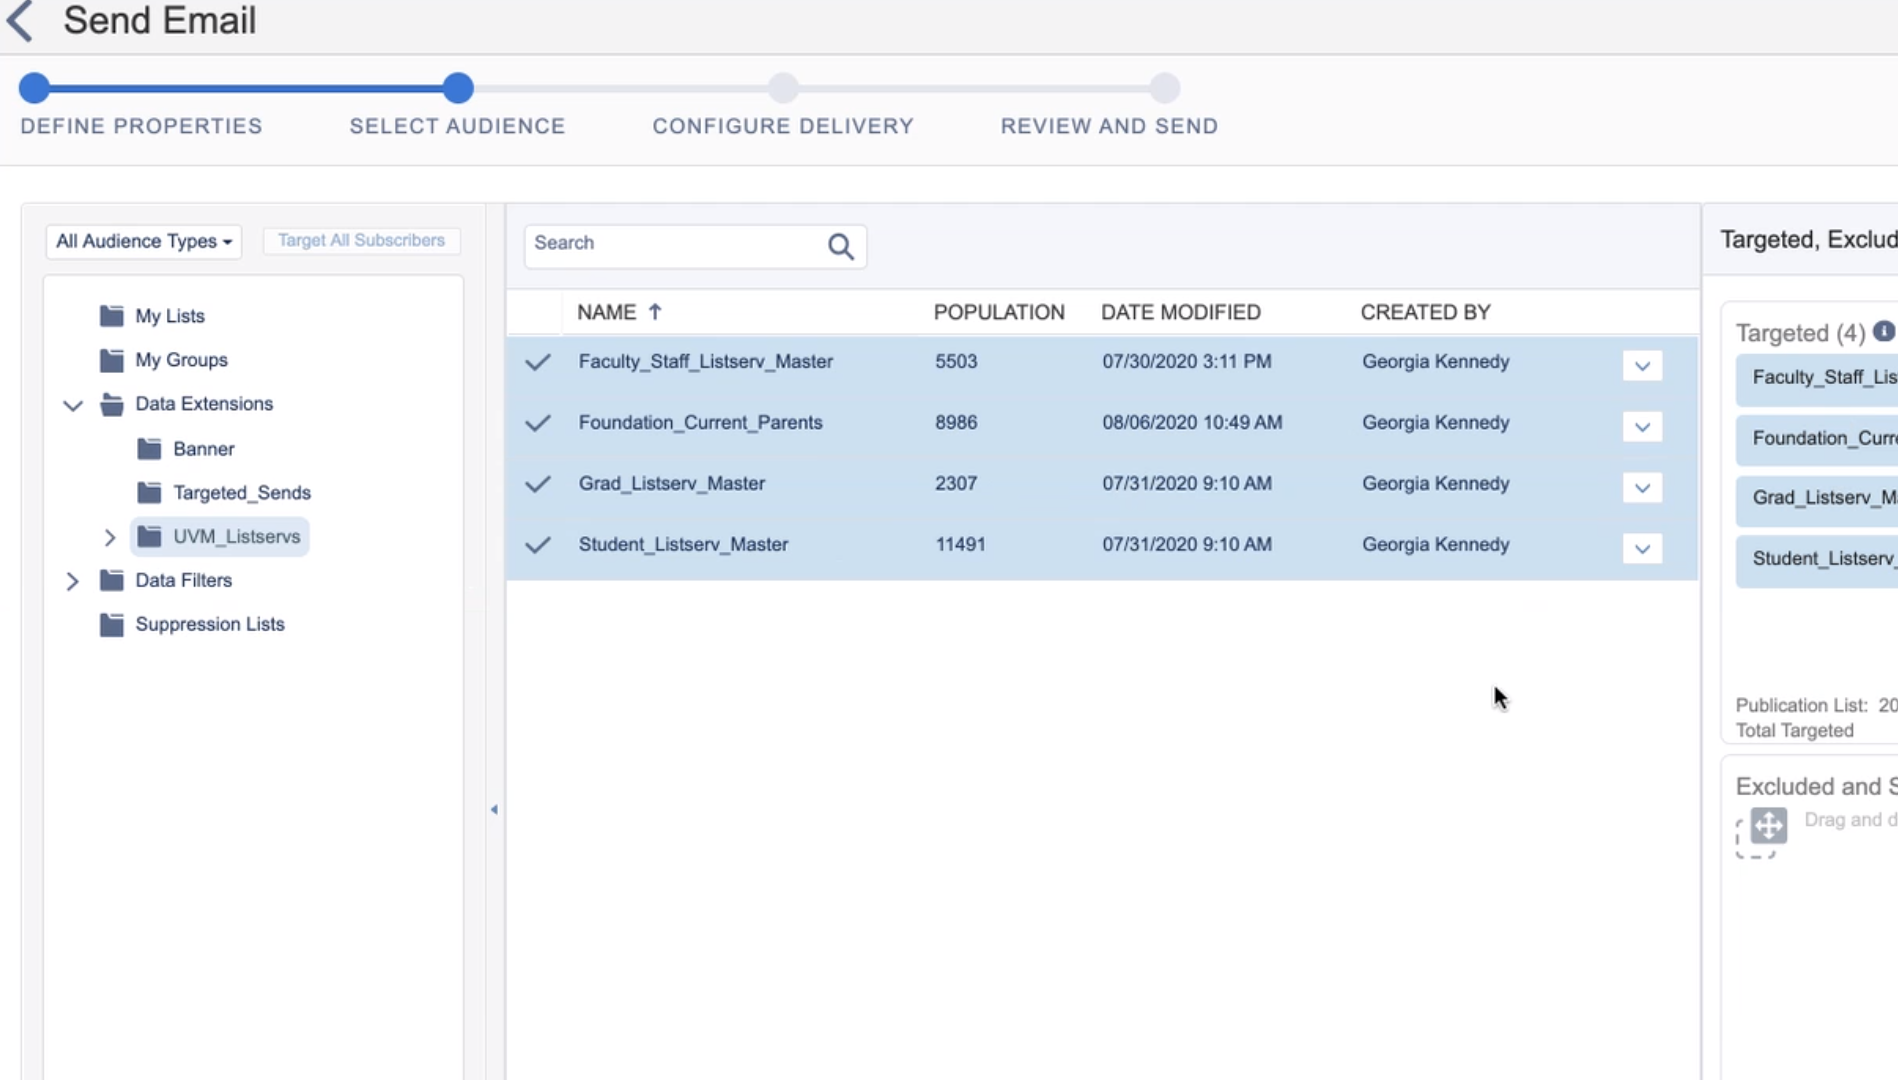
- Go into Data Extensions on the left to see available listservs.
- Drag and drop lists to the right box called "Targeted"
- Pick name of newsletter when prompted
- Select ‘Schedule” (check timezone)
- Arrive at snapshot of audience, delivery, etc.
- Select “Schedule” in upper right when everything looks okay.
- Go to “Email” Then select “Overview” tab on top — on the right you’ll see your scheduled send
- If you need to cancel, select the name of the newsletter.
DEFINE SENDER PROFILE
This is how you create new combinations of senders and return emails by following this path: Email Studio > Admin > Send Management > Sender Profile. You'll see what's pre-built and you'll have the ability to "Create" a new one.
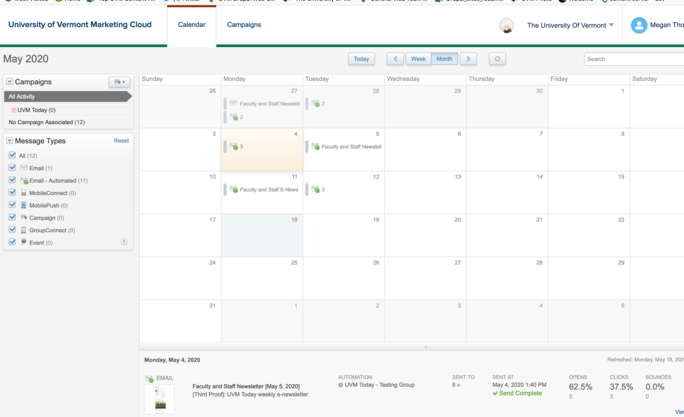
HOW TO LOOK AT ANALYTICS IN SALESFORCE
Find quick info about click-throughs and open rates:
Marketing Cloud > Calendar > Find date
BUILDING HTML COMMUNICATIONS USING EXTERNAL HTML SOURCES
View the documentation for using external html for a communication.