Polls can help engage students and give instructors a sense of how students are understanding the materials in “real-time.”
Using polls in class meetings
Adding polls to a meeting (non-channel meetings)
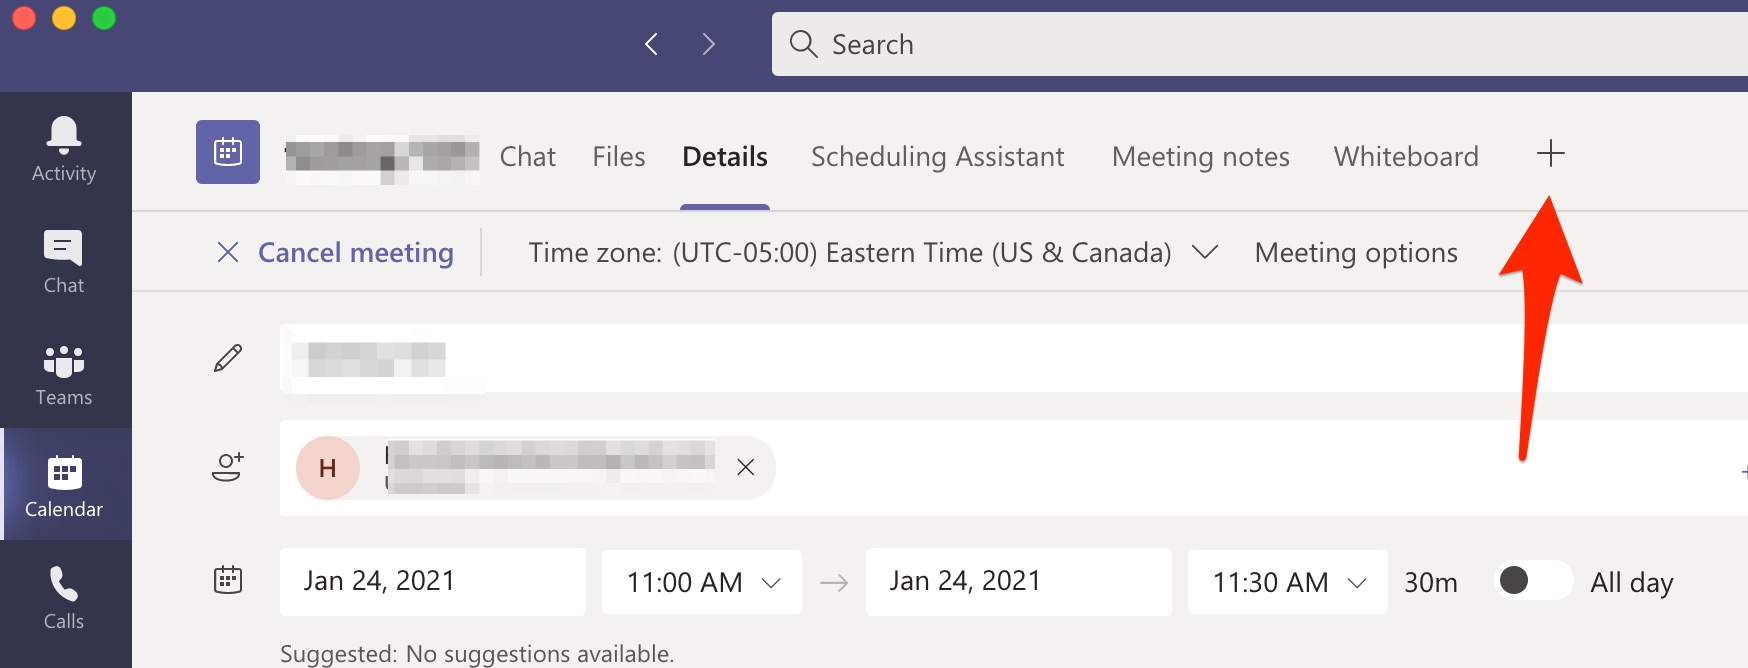
- After the meeting is created in your calendar, double-click on it in the calendar to open the meeting details page. Click on the + (plus) sign in the upper menu bar of this window.

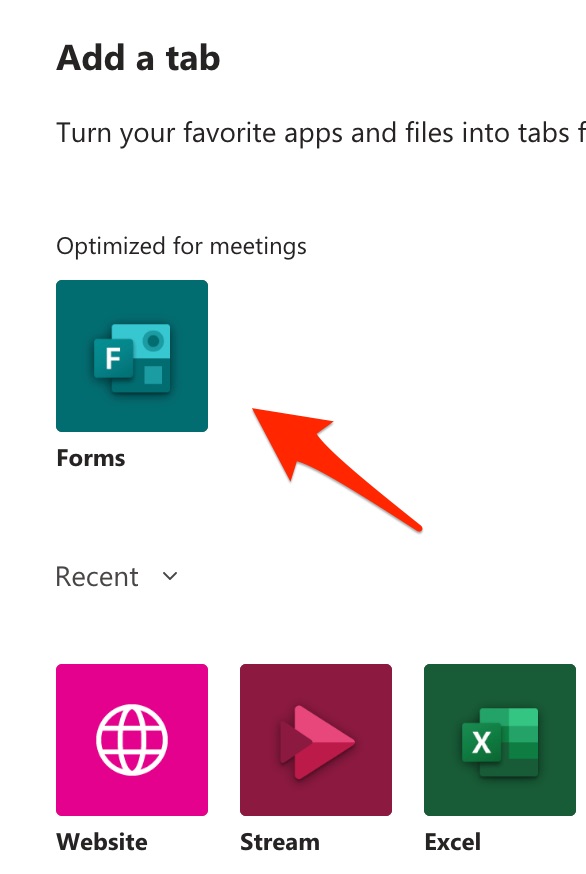
- After clicking on the plus sign, you’ll see a list of options, so select Forms.

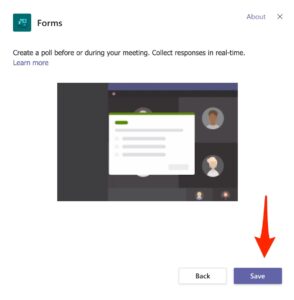
- The next screen will allow you to save this change to your meeting.
- NOTE: Once you click the Forms app to be added, you can go back to this same page (meeting details) and click Forms at the top to build your polls/forms that you can launch during your class meeting. You can also add them “on the fly” during the meeting itself, which is described further down.
- Because you added it in the settings of the meeting, when the meeting itself is in progress you will see that the Forms icon in the toolbar at the top of your meeting window.

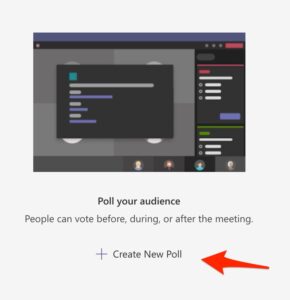
- Two ways you can create the polls:
- For on the fly polls, meaning you didn’t build them in advance, you can click on that icon to build a quick poll. You click “Launch” to show the poll to students.
- For polls you make in advance, you can go to your meetings settings window again (see step 1 for a reminder), click the Forms icon in window and start creating polls, leaving them in draft form. When your meeting is in progress, you can click the Forms button next to the Chat button in your meeting’s toolbar, and click “Launch” to present students with that poll.
- Here is the first screen you will see as you begin adding a Poll in your Teams meeting.
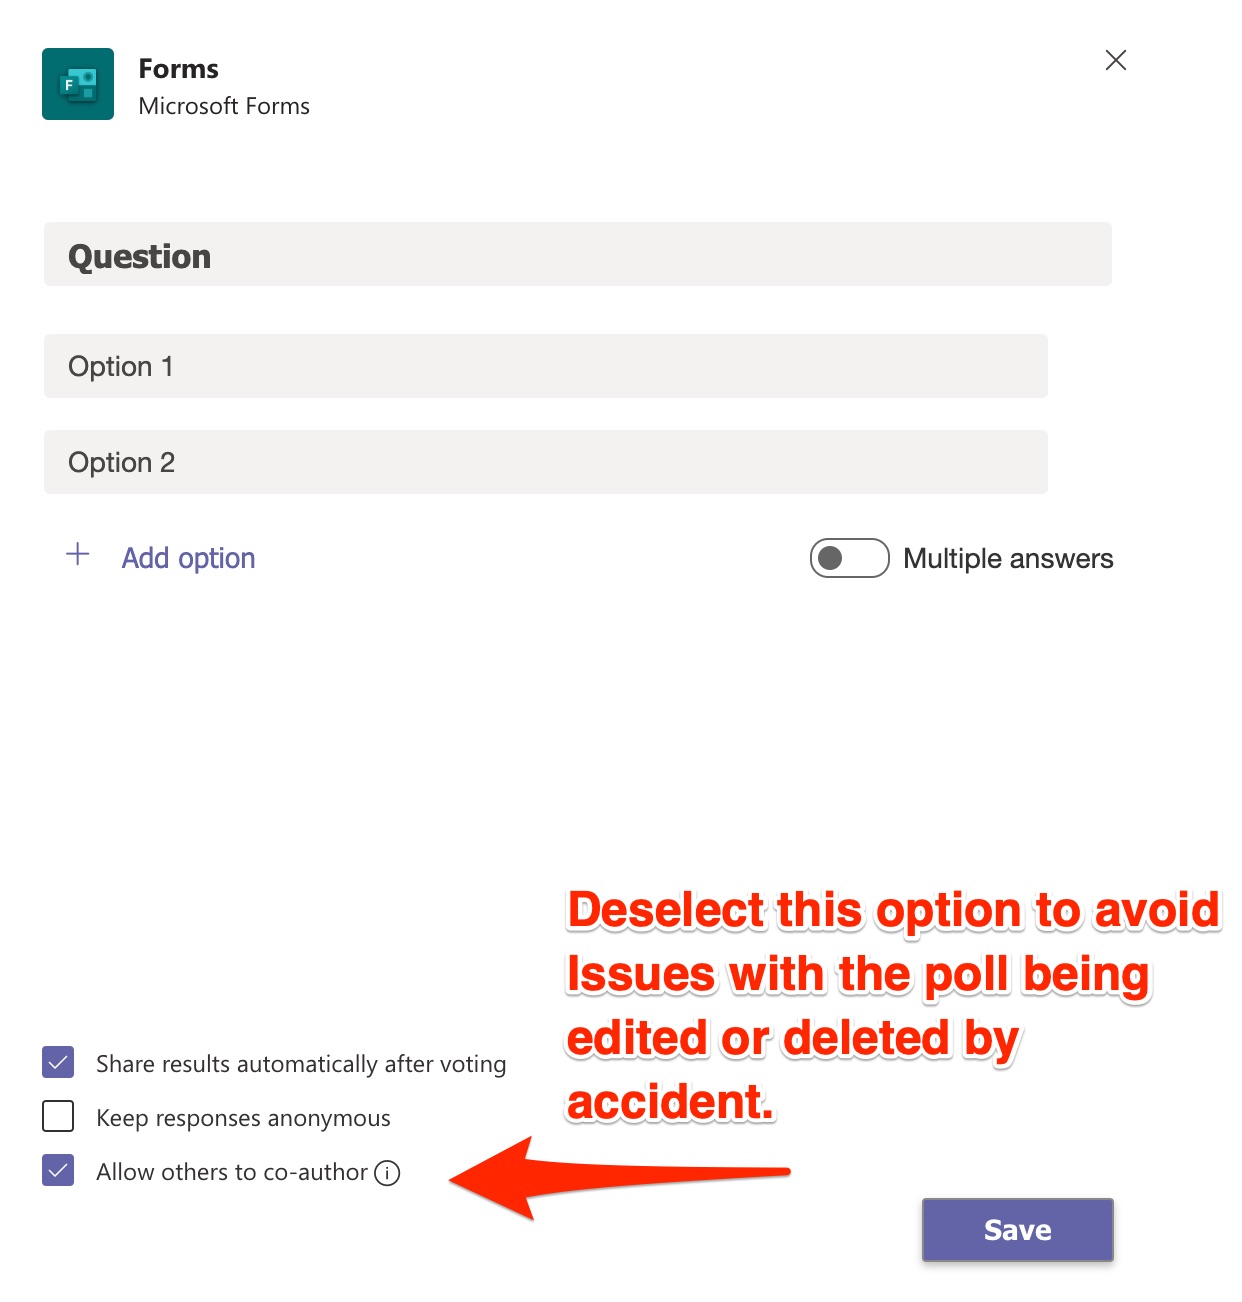
- In the next ‘edit poll’ window, you can type in a brief question and type in the options for the multiple-choice or multiple answer responses. We recommend deselecting the option to allow others to co-author.

- Once the poll is created, the poll is a draft until you click “Launch.”
 You can create several polls as drafts and then launch each one when you are ready for students to take them during the meeting. The poll will appear to students in a couple of places:
- They will see it pop up in the center of their screen where they can answer the questions.
- They can also answer it and see the results (if you chose to make them available) in the meeting’s chat window.
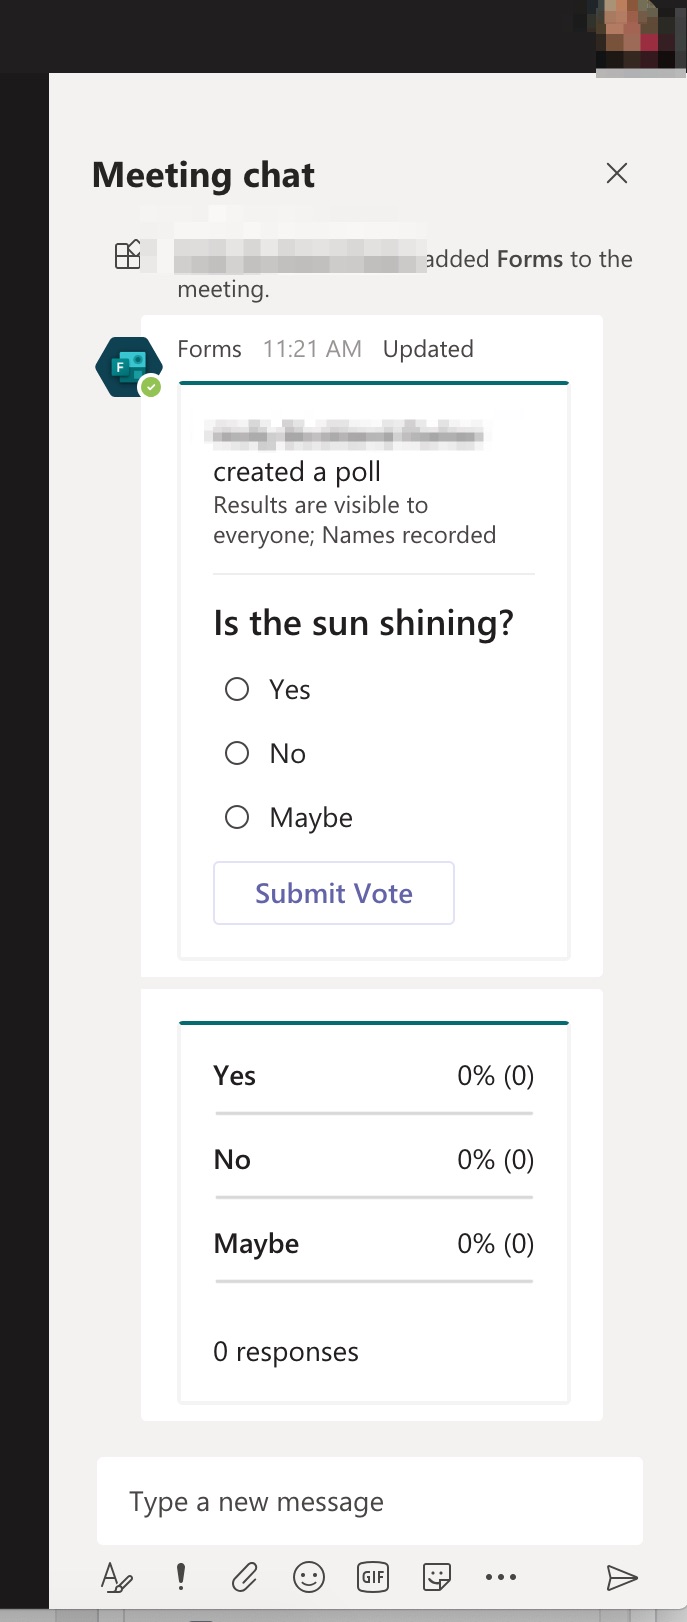
- OPTIONAL TIP: If your answers are long or contain characters that are hard to build into the poll, it’s possible to present the answers (up to 6 options) on a Powerpoint slide that you can display to the class during the meeting. Then, if you make your poll, enter a simplified question, like a keyword, and list the answer options that students will see simply as “A, B, C…” (or 1-6 if you prefer). Students will be looking at the slide to read the answer options and they can click the corresponding letter in the poll, in the chat window, for their answer. See example of how poll displays in the meeting chat.
- You will see the “real-time” results in the chat window of the meeting as the students reply. The students will also see the results in the chat window if you chose this option when you made your poll.


View poll results in Forms online (non-channel meetings)
- Go to forms.microsoft.com
- If you are not already logged in, click Sign In. Use your UVM email address, then NetID and password to sign in.
- You should now see polls you have access to.
If you do not see the poll you are looking for, click All My Forms in the lower right of the screen.
Follow these directions from Microsoft on how to see responses and download an Excel file.
Adding polls to a meeting (channel meetings)
- After the meeting is created, you should see a meeting post in the channel for which the meeting was created. To find the post, click the Teams icon on the left sidebar of Teams, then navigate to the team, then channel within that team.
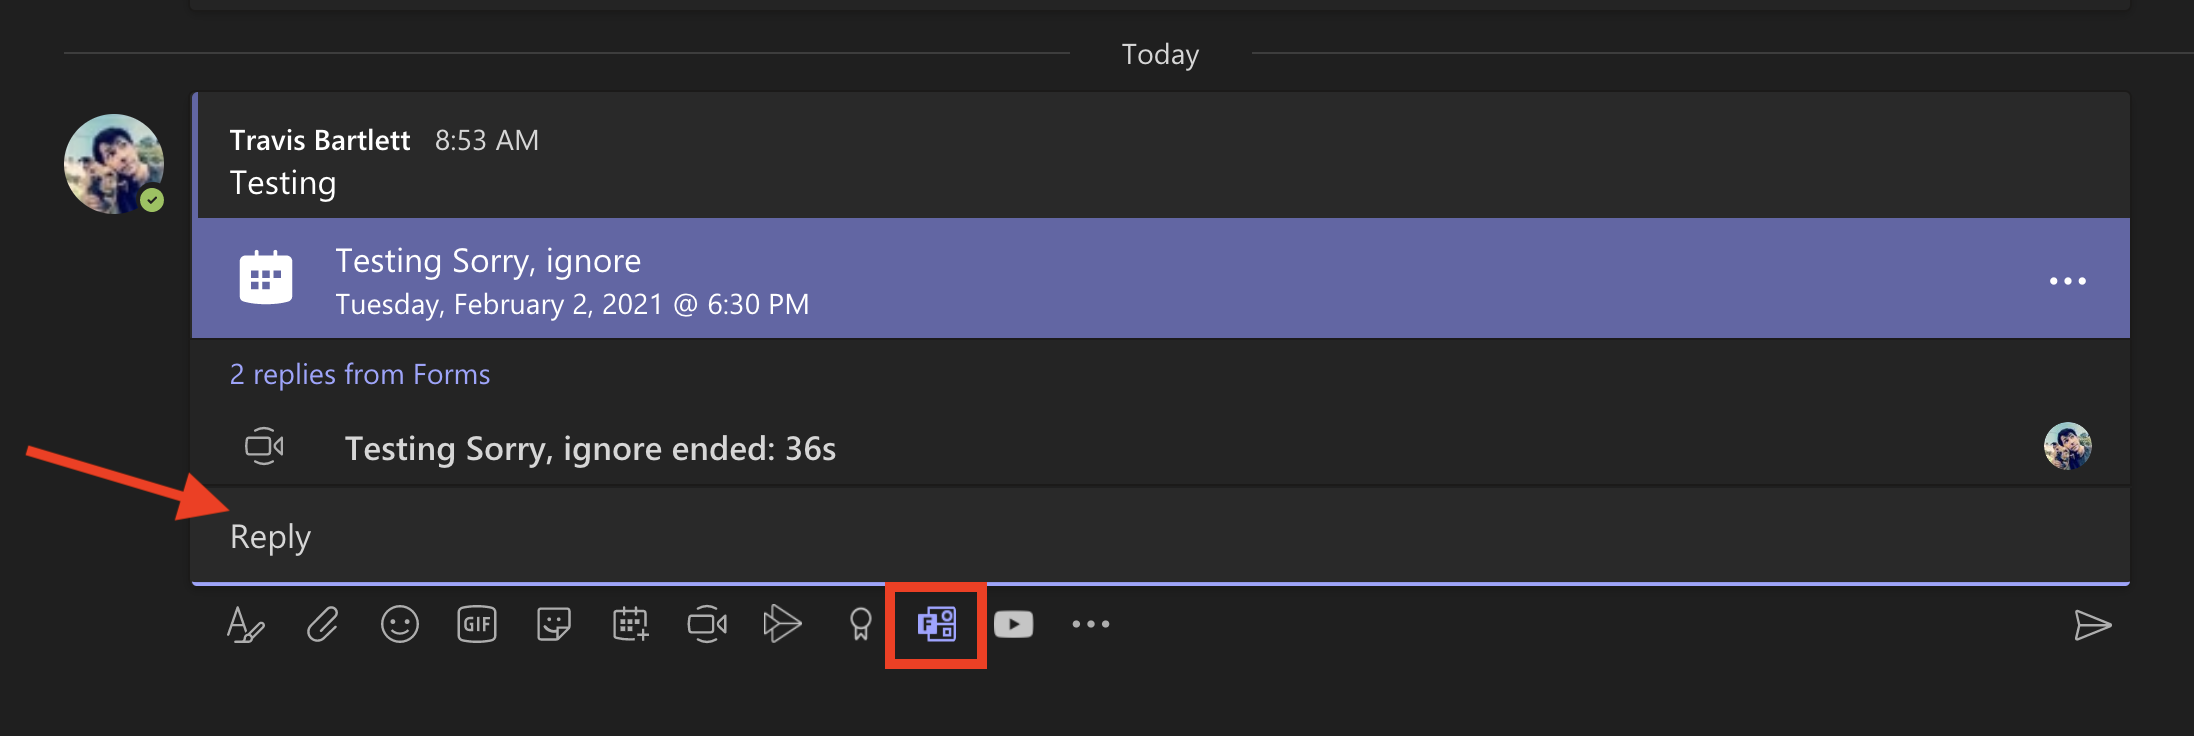
- To add a poll to the meeting, click Reply and then choose the Forms icon.
 From there you should be able to post the poll to the meeting. The poll will post immediately and will be visible in both this view and in the meeting chat view.
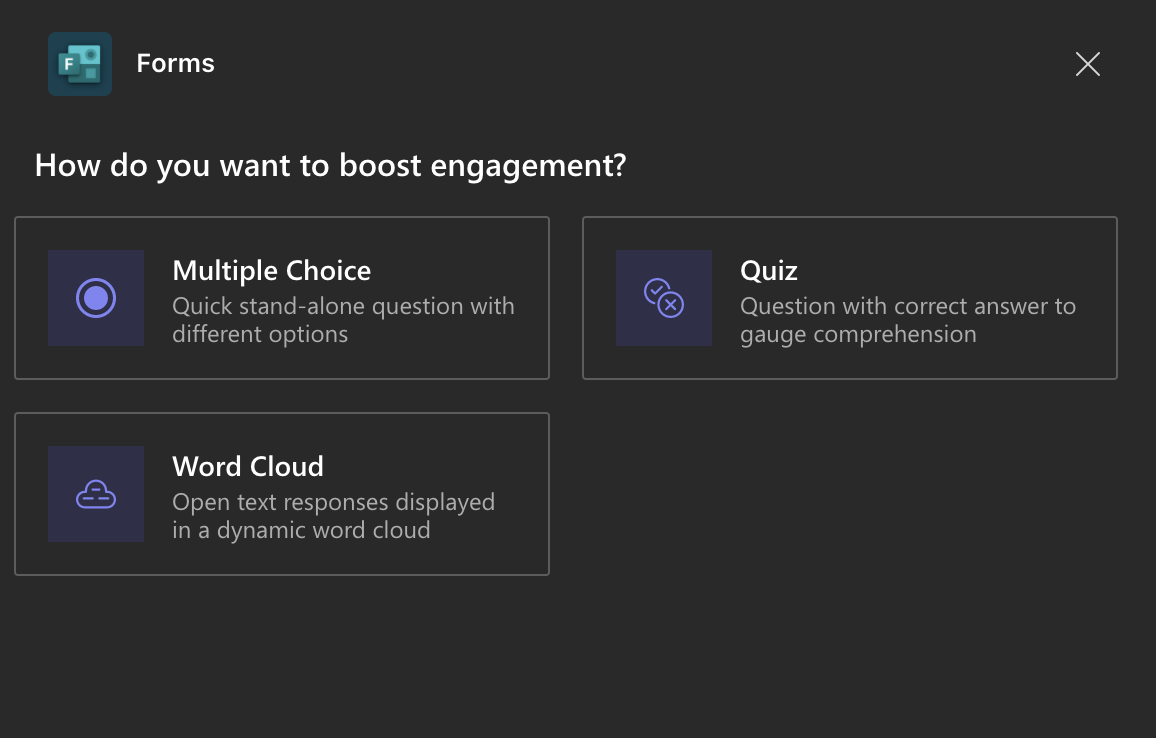
Poll Question Types
Polls offer three main question types: multiple choice, quiz and word cloud. Multiple choice and quiz are similar in their functionality. The word cloud question type allows participants to enter in a word or phrase which will generate a word cloud.