Search MS Office A-Z | Search Web Pages/ Design A-Z
|
One of the first things you may want to do is place an image on the page. But how do you make images and words cooperate?
You can position images on the page using the ALIGN attribute, and in this case, you can use the Top, Middle, or Bottom values, as well. The value you choose also will determine how the adjoining text flows around the image if the graphic is included in a block element, such as a paragraph <P>, or in a headline, such as <H1>. The default value is Bottom if no ALIGN value is set.
Code, such as the HTML elements and text we present in the following example, will cause the text within the block to display at the top of the image:
<IMG SRC=”building.jpg” ALIGN=”top” />The first line of this text will be positioned at the top of the image. The rest will start below the image, creating a large white space. Fortunately, there is a better way to handle this that more closely resembles what you could do with a desktop publishing program.
The text flow problem in the previous paragraph isn’t as evident when you use the Right or Left value, though. Thus, the following code will position the image to the right, with the text flowing neatly on the left side:
<IMG SRC=”building.jpg” ALIGN=”right” />This text flows on the left.
![]() Double Wraps Are Possible
Double Wraps Are Possible
You can even flow text around an image placed on the left side of the page and then make the text wrap around a different image placed on the right side. In this instance, the break element <B /> and its one attribute, Clear, come into use. Clear, as its name suggests, erases the alignment it specifies as its value. Therefore, this markup code stops the left-aligned image setting:
<IMG SRC=”building.jpg” ALIGN=”left” />This text appears to the right of the image.
<BR CLEAR=”left” />
|
Now the right-aligned image can be specified, and with the following code, the text will start at the top of the image and flow on the left side:
<IMG SRC=”building.jpg” ALIGN=”right” />This text appears to the left of the image.
![]() Give Me Some Space
Give Me Some Space
We have seen how to place an image and run text around it, but the aforementioned methods still don’t have the layout elegance that’s possible with a desktop publishing program. For one thing, the text tends to be too close to the image. A buffer space would be nice, and that’s where HSPACE and VSPACE come into play. HSPACE creates a buffer along the right side and left side of the image, whereas VSPACE creates a buffer along the image’s top and bottom.
These attributes, introduced by Netscape, were ones that the W3C (World Wide Web Consortium) adopted in 1996 for the HTML 3.2 specification. The HTML 3.2 specification also let Web designers employ tables and applets.
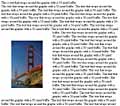
If you wish, you can even set the horizontal and vertical buffer spaces using measurements in pixels. For example, the markup code for a 50-pixel buffer looks like this:
<IMG SRC=”Bridge.jpg” ALIGN=”left” HSPACE=”50” VSPACE=”50”/>
The problem with HSPACE is that it inserts a buffer on both sides of the image, so if you want the image flush against the margin, you are out of luck.
![]() For More Appeal
For More Appeal
Although we wish we had more room to cover this topic further, at least we were able to look at several ways in which you can use white space and wrap text to create more appealing Web pages. Keep these methods in mind when your online layout could use a tune-up.